


+86-13826948503 (Bella)
+86-18145725878 (Carven)
Author: Site Editor Publish Time: 2025-08-08 Origin: Site
Installing a battery tender ring terminal harness is simple if you focus on polarity, the inline fuse location, wire gauge, and a tidy route that avoids heat and sharp edges. Using a wiring harness turns the job into a plug‑and‑play task—faster to install, more stable in daily use, and easier to maintain over the long term.
A battery tender lead works every day in the background, so a careful install pays off in safety and reliability. Correct polarity ensures your maintainer charges instead of shorting. An inline fuse close to the positive post protects the vehicle and charger if the lead is pinched. Proper wire gauge prevents warm cables and voltage drop on longer runs. A well‑built wiring harness with strain relief, weather caps, and a keyed connector saves you from intermittent faults and keeps charging efficient in motorcycles, ATVs, boats, RVs, and stored cars.
A good harness also feels seamless: it snaps into the maintainer without guesswork, resists vibration, and routes neatly behind body panels.
Power down and confirm polarity
Disconnect the battery safely. Remove the negative (−) cable first, then the positive (+). Identify the harness lead with an inline fuse; that goes to the positive post. Double‑check the markings before you touch the terminals.
Pick the right gauge and fuse (fuse near the positive post)
Choose a wire size that matches your run length and current. Most battery tender leads carry small currents, but you still want a sturdy jacket for abrasion. Place the inline fuse holder as close to the positive post as possible for best protection.
Mount the ring terminals (torque and anti‑corrosion)
Slip the positive ring under the positive post’s nut or bolt, then the negative ring on the negative post. Tighten to manufacturer torque so the rings don’t shift. A thin smear of anti‑corrosion grease helps in damp environments.
Route and secure (avoid heat/sharp edges, leave an access tail)
Run the harness away from exhausts, moving parts, and sharp metal. Use cable ties and grommets where needed. Leave a short, easy‑to‑reach connector tail for the charger so you don’t have to remove panels each time.
Test and label (voltage, charger indicator, and a tag)
Reconnect power. Plug in the maintainer and watch its indicator. If it shows normal operation, label the lead with date and fuse rating. Tuck the connector into a weather cap when not in use.
Use these quick tables to pick the right approach and dial in key specs for a battery maintainer wiring harness in different settings.
| Solution | Best use cases | Current capacity (typical) | Install effort | Long‑term reliability | Maintenance ease |
|---|---|---|---|---|---|
| SAE ring terminal harness | Motorcycle/ATV/boat/RV, long‑term storage | Low to moderate (maintainer range) | One‑time install | Very high (bolted rings, fused) | Plug‑and‑play, weather‑cap ready |
| Alligator clips | Temporary charging on exposed batteries | Low to moderate | None (temporary) | Low (can slip, no strain relief) | Easy but not ideal for daily use |
| DC barrel plug lead | Devices with matching jack | Low | Low | Medium (depends on jack quality) | Easy if jack is accessible |
| Micro 1.25 mm board harness | Small battery modules, internal boards | Very low | Moderate (board mating) | High in sealed devices | Serviceable in bench work, not for high current |
Note: A ring terminal battery charger harness with SAE connector is the go‑to for vehicles that sit for weeks. A battery wiring harness for motorcycle installs should be fused and routed to a discrete spot near a fairing cutout or under‑seat edge.
| Parameter | Typical choices | Why it matters |
|---|---|---|
| Wire gauge (AWG) | 16–18 AWG for most maintainers; 14 AWG for longer runs | Keeps resistance low and cable cool |
| Inline fuse rating | Follow charger guidance; commonly small automotive blade fuses | Protects against shorts and pinched leads |
| Lead length | Just enough to reach an accessible spot (often 12–24 in) | Shorter is tidier; long tails can snag |
| Jacket type | PVC/XLPE/Silicone depending on temp and flexibility | Silicone stays flexible in cold; PVC is common and durable |
| Ring size | M6 or M8 depending on battery post hardware | Correct hole size ensures tight seating |
| Weather cap | Snap cap for SAE tip | Keeps dust and water out when not charging |
If you’re configuring a harness for production or fleet service, consider plug retention, keyed housings, and strain relief boots. Huamao’s catalog spans Wire Harness Assembly, PVC Cable, XLPE Cable, Silicone Cable, and connector families (Wire to Board Connector, Wire to Wire Connector, Terminal Connector) to align your build with real‑world conditions.
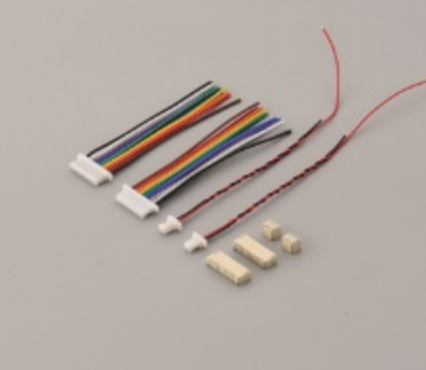
People often mix up ring terminal leads for vehicle charging and tiny board connectors used inside devices. A 51021 1.25mm wiring harness typically refers to a micro‑pitch wire‑to‑board harness used in small battery modules and compact electronics. It’s perfect for short internal links at low current inside a sealed unit—not for a high‑current ring terminal harness that lives on a motorcycle, ATV, boat, or car battery.
For a maintainer in the battery application, choose a fused SAE ring terminal harness with durable jacket and strain relief. Use micro‑pitch board connectors only when you are linking a small battery pack to a PCB in a controlled enclosure.
Motorcycle, ATV, and snowmobile: space is tight and vibration is real. Route the 12V battery harness with ring terminals away from hot headers and sharp subframe edges. Zip‑tie every 6–8 inches, and use a protective sleeve if the cable passes a panel gap. Leave the SAE plug under the seat or near a fairing cutout so you can connect the charger quickly. For beginners, a “beginner guide to battery wiring harness” approach is to keep runs short, protect the fuse, and label the tail.
Boats and RVs: moisture comes first. A marine battery tender harness benefits from a sealed weather cap, corrosion‑resistant rings, and occasional inspection. Keep the fuse close to the positive post in the battery compartment, and avoid routing alongside radio or sonar bundles to reduce noise coupling. If you store an RV long‑term, an easy‑reach SAE ring terminal harness install will save you time each trip.
Small device battery packs: when you “connect battery to board” in compact gear, a micro connector makes sense. A 1.25 mm pitch plug snaps to a board receptacle, allowing quick swaps without solder. Remember, this is not the path for a maintainer lead; use it to bridge a small pack to a PCB inside the case and keep currents very low.
Charging light won’t turn green: confirm the charger is in maintainer mode and that the SAE plug is fully seated. Check the inline fuse near the positive post; replace it if blown, then inspect for pinched insulation. If the charger trips repeatedly, look for a reversed lead or corroded battery posts.
Fuse keeps blowing: reduce strain on the cable route and verify the fuse rating matches the charger spec. A “fused battery tender lead” protects you, but repeated blows mean a short—often where the cable rubs a bracket.
Wrong polarity symptoms: many maintainers are protected, but a reversed lead won’t charge. Follow the “SAE ring terminal harness install” guidance and match positive to positive, negative to negative. If polarity is unclear at the plug, use the charger’s manual to confirm which pin is positive.
Loose or rattling connector: add a clamp or tie to support the lead near the plug. Consider a weather cap that also improves tip retention.
Worn jacket: re‑route away from edges; add split loom or heat‑resistant sleeving around hot zones. Replace damaged segments; don’t tape over deep nicks near the battery.
Tool‑free quick connects are becoming standard, with keyed housings that prevent reverse insertion. Weather caps now seal better, keeping dust and spray at bay. Low‑temperature silicone jackets stay flexible in winter, making cold‑garage charging easier. For makers, a battery maintainer wiring harness with modular tails—SAE to ring, SAE to alligator clip, SAE to DC barrel—covers home garage and travel use without rewiring.
Huamao’s category highlights line up with these trends: high‑quality construction for durability, seamless integration for plug‑and‑play installs, and industry compliance backed by rigorous quality control. That combination is ideal for fleets, OEM service kits, and DIY users who want a lead that simply works season after season.
A dependable harness is built from good materials and assembled consistently. Quality shows in clean crimps, accurate strip lengths, snug ring fit, and a fuse holder that clicks shut. Beyond appearance, the real value is the production discipline: documented inspections, continuity checks, and functional tests before shipment. That is what “high‑quality construction,” “seamless integration,” and “industry compliance” mean in practice.
Huamao offers wiring harness solutions for many environments, from automotive and new energy systems to medical and consumer electronics. If you need a “battery wiring harness for motorcycle,” an RV maintainer tail, or a custom lead for an equipment bay, you can draw from Wire Harness Assembly, PVC/XLPE/Silicone Cable, and connector families under one roof—simplifying supply and ensuring consistent results.
Before you order a custom harness for a battery maintainer, note the basics that make installation smooth. Start with your battery type and voltage. Add expected current from your charger; this guides the wire gauge and fuse size. Decide how long the lead should be and where the connector will live when capped. Select ring size that matches your hardware, and pick a jacket that fits your climate—PVC for general use, silicone if you ride in the cold. Request labeling so the next tech knows the fuse rating and date. If your setup needs a special pass‑through grommet, include that as well. The more precise your spec, the faster your lead time and the better the fit.
If your system has both a vehicle maintainer and a small internal pack, separate the designs: use a fused SAE lead for the vehicle battery, and a 51021 1.25mm wiring harness or other micro connector for the board‑level pack. That keeps each task in its safe, proven lane.
Q1: What’s the correct order to install a ring terminal harness?
A1: Disconnect the negative cable first, then the positive. Attach the positive ring with the inline fuse to the positive post, then the negative ring to the negative post. Tighten both, route the cable away from heat and sharp edges, cap the SAE plug, and test the charger for normal operation.
Q2: What fuse size should I use for a battery tender lead?
A2: Follow your charger’s guidance. Maintainers draw modest current, so a small automotive blade fuse is typical. Place the fuse holder as close to the positive post as possible. If the fuse blows repeatedly, look for shorts from pinched wire or reversed polarity rather than just upsizing the fuse.
Q3: Which wire gauge works best for a maintainer harness?
A3: For short runs in motorcycles and ATVs, 16–18 AWG is common. Choose 14 AWG for longer routes or if the harness passes near warm components. The goal is low resistance, tough insulation, and a jacket that holds up in your climate—PVC for general use, silicone for colder weather.
Q4: Will this setup work with lithium batteries?
A4: Yes, if your charger supports your lithium chemistry and you follow the same polarity, fuse, and routing rules. Always confirm the charger’s lithium mode. The ring terminal harness itself is neutral; the charger’s profile must match the battery type to avoid damage.
Q5: How do I confirm SAE polarity on my harness?
A5: Check the charger’s manual for which pin is positive, then match it to your installed lead. Many SAE connectors are keyed but can be wired either way, so verify before plugging in. If the maintainer’s light stays abnormal, recheck polarity and the inline fuse at the battery.
Q6: How can I weatherproof the connector tail outdoors?
A6: Use a snug weather cap on the SAE tip, route the tail into a protected nook, and add a small dab of dielectric grease on the rings and screws in harsh climates. Inspect the jacket seasonally. In marine settings, pick corrosion‑resistant rings and keep the cap closed when not charging.
Q7: When would I use a 1.25 mm micro connector instead of rings?
A7: Use a micro board plug when linking a small battery pack to a PCB inside a device—bench testing, compact electronics, or modules with low current. That’s a board‑level solution. For vehicle charging and maintainers, stick with a fused ring terminal harness; they serve different jobs.
A clean, fused, and well‑routed install is the secret to a maintainer that “just works.” Keep polarity straight, mount the fuse near the positive post, choose a sturdy gauge, and leave a reachable connector tail for daily convenience. A purpose‑built wiring harness upgrades the experience to plug‑and‑play, extending battery life with less hassle.
Ready to compare options or spec a custom lead for your motorcycle, ATV, boat, RV, or workshop? Start here: custom wiring harness solutions
